How to install a range hood vent through ceiling – this is a type of question that someone may ask when looking for a way to eliminate awful cooking smells from their kitchen. Mounting a range hood may seem quite complicated and challenging at first. However, with the help of the right toolbox, it will turn out to be one of the easiest jobs to do. Whether you’re already a specialist or a first-timer, the steps below will help you do the task in the fastest way.
Prepare the required equipment
There’s no need to find out the cost to install a range hood vent through ceiling. Just gather the following equipment and toolbox and you’re ready to install your range hood vent:
Equipment
- Pipe flasher
- Screw holders
- Cable nuts
- Pipe clip
- Duct
- Rangehood
- Wire clamps
- Vent cap
- Iron piping
- Electric wires
Necessary toolbox
- Caulking gun
- Gloves
- Plug specks
- Iron sheet shears
- Drywall saw
- Cable clipper
- Mallet
- Measuring tape
- Returning straw
How to install a range hood vent through ceiling
The installation time will depend on your expertise level. If you’re already an expert, the work will be finished just within a short time. However, in case you are a greenhorn, the whole process may take a while to complete.
Step 1: Dismantle the device into units
It’s way easier to install any equipment once its parts are disassembled one after the other. Loosening the range hood vent’s member parts will allow you to install the device much quicker and effortlessly. When the essential equipment is successfully fixed, you can easily attach the remaining parts.
The units needed to be detached are the filter and the fan of the range hood vent. Remember to keep them safe in order to avoid damage. Moreover, make sure that you have an empty space above the hood before figuring out how to install a range hood vent through ceiling.
You may find interesting: West Bend Bread Maker recipes for tasty homemade breads
Step 2: Mark out the precise spots for installation on the ceiling
This step is particularly essential and the success of the task depends on it. Take the range hood vent’s exact lengths using a measuring tape. Next, you need to mark out the precise spots for installation on the ceiling with a marker. Check if the range hood vent fits the spots on the ceiling for confirmation.
Step 3: Puncture holes using an electrical drill on the marked spots
After all the spots are marked precisely, the next thing you need to do is puncture holes on them. Use a drill machine to make holes on the ceiling. Not only for the range hood, you also need to puncture 1 or 2 more holes so that the electrical wires can go through.
To conduct this step, a certain level of pinpoint accuracy is required. Because if you make any mistake, the following procedures will go south. Make sure that the holes match perfectly with the marked spots.
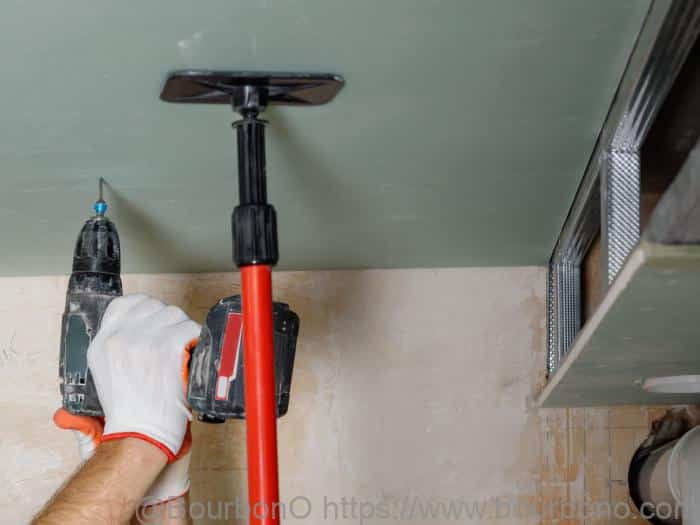
Step 4: Make a hole on your ceiling
Different types of ceilings require various tools. Never use the same tool for a concrete ceiling and a wood one. Once you are done creating necessary punctures, it’s time you prepare for the ceiling outlet. For those who are first-timers, this task might be quite difficult. Just do your best and make an opening that allows the range hood vent to go through the ceiling.
Step 5: Assemble the units that you detached before
You have disassembled some units from the range hood vent. Now it’s time to fix them in to correctly install the device. When fixing back the units, pay attention to the wire clips. It’s best that you call someone so that they could help you hold the wire clips in place. Once this step is complete, you’re ready to mount the range hood vent on your ceiling.
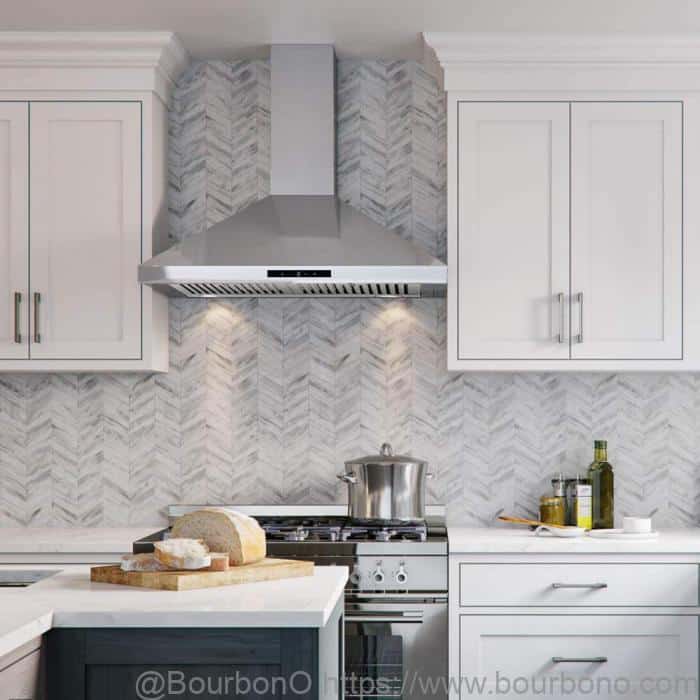
Step 6: Mounting and installing the range hood
After all the initial steps, now you can install your range hood vent for the kitchen. Duct all the vent’s nooks jointly into just one place, ensuring its right. Then you can effortlessly install the range hood vent into the hole you made on the ceiling.
Step 7: Wrap up and hold the range hood firm
Now, you need to wrap up the range hood using ceiling tar so that it can stay firm. Also use ceiling tar to wrap up the piping that is attached to the roof. Make sure you apply enough sealing tar to hold the units in place.
Related article: Nostalgia Ice Cream Maker recipes that you can make at home
Step 8: Conclude and tidy up
To conclude the installation, inspect all of the vent’s unit and make sure it’s intact. Put back your toolbox and equipment, then tidy up your work area. That’s all you need to know on how to install a range hood vent through ceiling.
Useful tips for correct installation of a range hood vent
- Make sure that all of the electrical appliances near the work area are disconnected.
- Make use of a saw to cut cables and ducts so that the things on the other side are not damaged.
- Instead of smaller range hood vents which are rowdy, choose bigger ones as they’re more effective.
- Plan everything well before installing a vent. Make sure that the electricity in your house matches the needs of a range hood vent.
- Disconnecting the electrical wires is important when you’re figuring out how to replace a range hood vent through ceiling.
- If you can’t find a way to pitch the range hood vent through the ceiling, buy one that helps refining air and gives back.
When a range hood vent is installed in your kitchen area, it’ll help enhance the air circulation. After finding out how to install a range hood vent through ceiling, anyone can easily employ this DIY strategy to save lots of money instead of hiring professionals to do the work for you. Don’t forget to check out more useful kitchen tips on Bourbon O’s website!