Cookie monster smash cake is a perfect choice for birthday parties or just a lovely surprise to brighten up your kid’s day. Below, we will provide you with step-by-step instructions to recreate a version of this cake all by yourself. Including how the make the blue frosting, how to assemble and decorate the cake as well. Let’s check it out!

Make the blue frosting for the cake
With regard to the frosting, there are two options for you to choose. Either you can go with the traditional vanilla frosting or mascarpone whipped cream. However, the latter is considered the more suitable choice. As it consists of far less sugar and makes the piping easier.
Step 1: To dye the frosting, you have to use food colorings. And it’s best that you wear food safe gloves and prepare some towels to clean when needed. The food dye colors for the cake are blue (royal blue or electric blue) and black.
Step 2: Whip the mascarpone cream to obtain soft peaks and set aside 1/4 cup of frosting (dyed in black) for Cookie’s mouth. Then beat in about 1/2 teaspoon of blue gel color and powdered sugar until the color is fully incorporated. You can add extra drops of blue color to achieve the desired color.
Step 3: Finally, fill the piping bags with whipped cream (only 2/3 full) and use a rubber band to tie off the end. Refrigerate until you’re ready to use them.

You may find interesting: Black and Gold Drip Cakes: Desserts for Elegant Occasions
Assemble Cookie monster smash cake
The assembling part only takes a few basic steps, then you’ll be ready for the decoration:
Step 1: Level the cake
The cake must have a flat top. Use a serrated knife or a cake level to trim the and level the cake evenly.
Step 2: Stack the layers
As it’s a smash cake, you don’t have to add too much frosting between each layer, 1/4 – 1/2 cup of frosting will help to hold them together. Then spread the frosting evenly across the layer’s surface. You can also invert the top and second layer to create a flat surface. Which makes it easier for decorating and stacking.
Step 3: Add the structure
When all the layers are stacked on top of one another. Cut 3 wooden dowels or plastic straws just short of the cake’s height. Place them inside the cake in a triangular form to hold the layers more steady.

Decorate Cookie monster smash cake
Here’s the fun part that any cake baker always enjoys doing: decorating! The picture might look intimidating but don’t worry, you can easily pull it off with the instructions below:
Step 1: Crumb coat the cake
Apply a thin layer of frosting on the exterior of the cake (crumb coat). Be sure to use a bench scraper or an offset spatula to spread the icing and make it more smooth and even. If there’s any gaps in between the frosting layers, remember to fill them as well.
Step 2: Prepare the piping bags
The piping bags should be used one by one. If you feel like the frosting is getting runny or soft, put it in the freezer and grab another one. Assemble a grass tip and a coupler to a small piping bag. Then drop a bag filled with blue frosting inside the piping bag.

Step 3: Cut out the Cookie monster’s mouth
Cut the Cookie monster’s mouth with a serrated knife. Angle the knife at about 45 degrees (like a half moon) and make the top cut. Make the bottom cut with the knife angled upwards at 45 degrees, meeting the edges of the mouth’s upper part. Gently remove the piece you just cut.
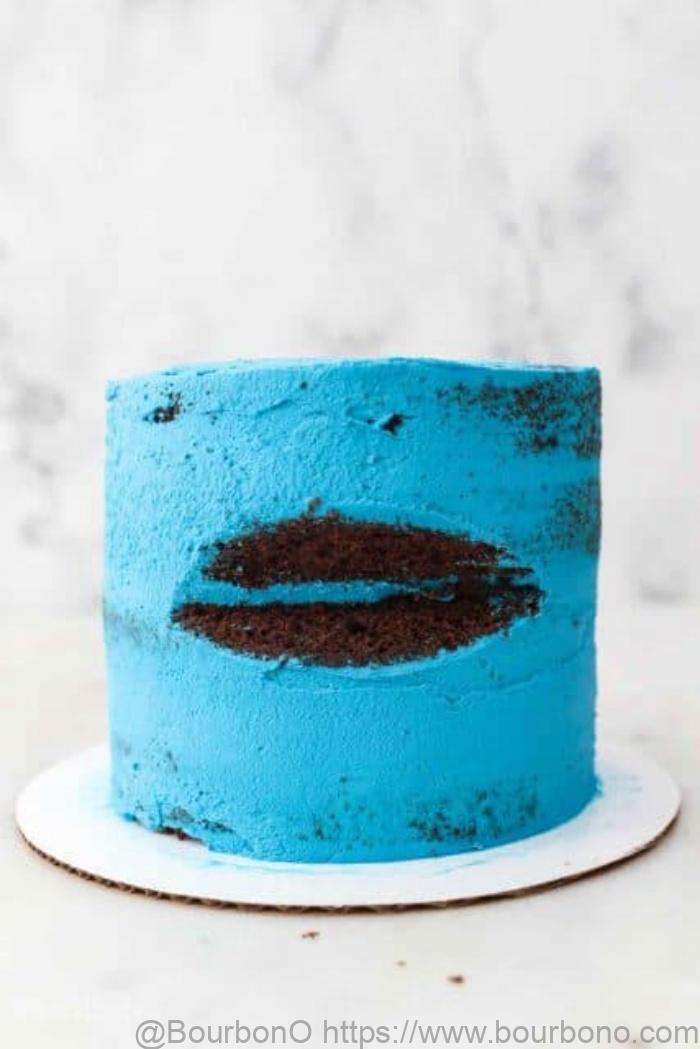
The mouth can be left as it is or you can cover it with blue, red or black frosting. Using the fondant pieces also works wonders.
Related article: Chocolate Cake with Hazelnuts: a Delicious Treat for Any Occasions
Step 4: Start piping
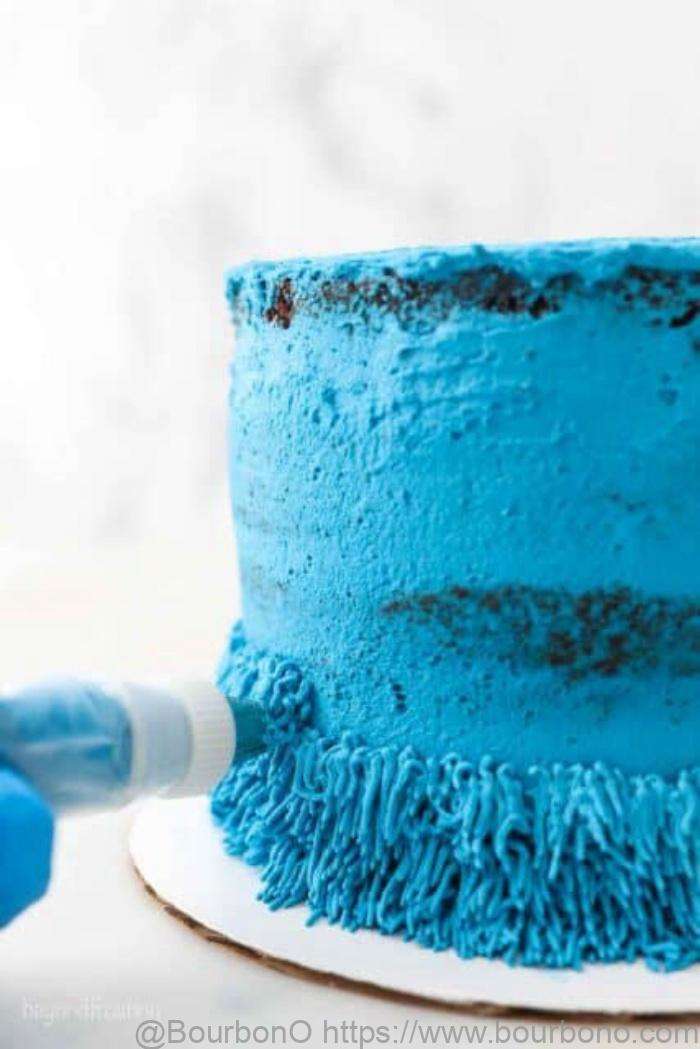
Piping the outside of the cake to imitate the Cookie monster’s fur is the most challenging step of all. Start off with the bottom edge and pipe in a circle around the cake. Press the tip of the piping bag against the cake’s edge and pull it away gently as the frosting comes out of the bag. The hair will be longer or shorter depending on how long you pull away the piping bag.
Just slightly above the first layer, you can start the second layer. Pull the frosting downward to make it sit on top of the first layer. Repeat the same process until the side of the cake is fully covered with frosting. For the top, start piping from the outside edge and continue in a circle to reach the centerpoint.
Make the eyes for the Cookie monster smash cake
Step 1: To make the eyes, prepare some white fondant (4-ounce), black fondant (about 1/8 inch thick), a small circle cutter (you can use a 1M piping tip instead) and a small rolling pin.
Step 2: Split the white fondant in two pieces, then make two balls out of them. Roll out a 1/4 size piece of black fondant and use the circle cutter to cut out 2 pieces.
Step 3: Use some water to dampen the black circles and place on the white fondant eyeballs. Then set the eyes on the Cookie monster’s head before serving. Don’t forget to set one eyeball off center to create Cookie’s wacky look.

Once covered in frosting, Cookie monster smash cake needs to be put in the freezer. Don’t forget to cover it with an airtight container. Otherwise the frosting will dry out and crust. This will not only make the cake look less appealing but also less delicious. The other choices are a tall cake box or a cake carrier. Hope the above instructions will help you a great deal and see you in Bourbon O‘s next article!